3D design example: Difference between revisions
Brian Wilson (talk | contribs) mNo edit summary |
Brian Wilson (talk | contribs) mNo edit summary |
||
| Line 8: | Line 8: | ||
Here is the bowl. The lid is askew a bit because the lid from solution #1 is hiding underneath. | Here is the bowl. The lid is askew a bit because the lid from solution #1 is hiding underneath. | ||
[[Image:BowlOriginal.PNG|thumb]] | [[Image:BowlOriginal.PNG|left|thumb|Unmodified bowl and lid]] | ||
* CAD software: OpenSCAD | * CAD software: OpenSCAD | ||
| Line 20: | Line 20: | ||
Here is the bowl and a lid I printed for it shortly after I got the printer. It is one of my first designs. | Here is the bowl and a lid I printed for it shortly after I got the printer. It is one of my first designs. | ||
[[Image:Lid_no1.PNG|left|thumb| | [[Image:Lid_no1.PNG|left|thumb|PLA lid]] | ||
<br clear=all> | <br clear=all> | ||
| Line 28: | Line 28: | ||
Problem #2: When used in a microwave. steam from heated food is absorbed into the PLA, so it warps. | Problem #2: When used in a microwave. steam from heated food is absorbed into the PLA, so it warps. | ||
[[Image:LidWarped.PNG|thumb]] | [[Image:LidWarped.PNG|left|thumb|Wrinkles on underside of PLA lid]] | ||
This PLA is not food grade so I did not really want it in contact with food anyway. | This PLA is not food grade so I did not really want it in contact with food anyway. | ||
| Line 48: | Line 48: | ||
They are too brittle, so when I tried to snap the knob onto the lid, they snapped off. | They are too brittle, so when I tried to snap the knob onto the lid, they snapped off. | ||
[[Image:OnePiecePLA.PNG|thumb]] | [[Image:OnePiecePLA.PNG|left|thumb|Frst attempt, all PLA]] | ||
PLA is brittle but has a nice hard smooth surface. | PLA is brittle but has a nice hard smooth surface. | ||
| Line 60: | Line 60: | ||
=== Design #2 - PLA + Nylon === | === Design #2 - PLA + Nylon === | ||
[[Image:ExplodedSCAD.PNG|thumb]] | [[Image:ExplodedSCAD.PNG|left|thumb|OpenSCAD design]] | ||
PLA | PLA handle | ||
[[Image:PLA_Knob.PNG|thumb]] | [[Image:PLA_Knob.PNG|left|thumb|Outer handle]] | ||
Nylon insert | Nylon insert | ||
[[Image:Nylon.PNG|thumb]] | [[Image:Nylon.PNG|left|thumb|Failed nylon insert]] | ||
To understand why design #2 fails, you have to think about how 3D printing works. | To understand why the insert in design #2 fails, you have to think about how 3D printing works. | ||
Software converts your 3D model into layers. | Software converts your 3D model into layers. | ||
A thin bead of plastic is squirted out an extruder (just like a glue gun) to form each layer. | A thin bead of plastic is squirted out an extruder (just like a glue gun) to form each layer. | ||
This means when I tried to push sideways on the fingers, they just parted on the join between the layers. Snapped right off! | This means when I tried to push sideways on the fingers, they just parted on the join between the horizontal layers. Snapped right off! | ||
Some of them broke at the base and some broke at the thin spot. | |||
<br clear=all> | <br clear=all> | ||
| Line 88: | Line 89: | ||
It works! | It works! | ||
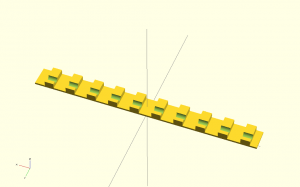
[[Image:NylonStrip_SCAD.PNG|thumb]] | [[Image:NylonStrip_SCAD.PNG|left|thumb|OpenSCAD design of flat strip]] | ||
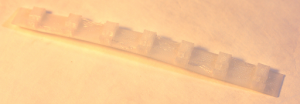
[[Image:NylonStrip.PNG|thumb]] | [[Image:NylonStrip.PNG|left|thumb|Printed strip]] | ||
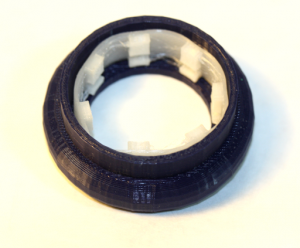
[[Image:PLA_Nylon.PNG|thumb]] | [[Image:PLA_Nylon.PNG|left|thumb|PLA handle with strip inserted]] | ||
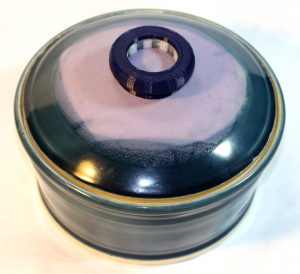
[[Image:PLA_Nylon_final.PNG|thumb]] | [[Image:PLA_Nylon_final.PNG|left|thumb|Completed project]] | ||
[[Category: 3D Printing]] | [[Category: 3D Printing]] | ||
Revision as of 15:26, 13 January 2014
The problem
We got a bowl from a rejects pile from a neighbor who does porcelain ceramics. It's nice, but the handle on the lid is too small for human fingers.
So this is the story of using a $2000 Makerbot Replicator 2 to fix a $5 bowl. :-) This is the story of most of my 3D printing projects so far...
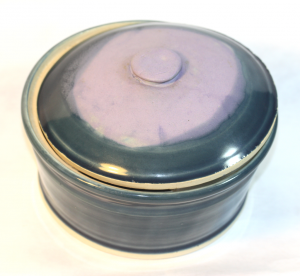
Here is the bowl. The lid is askew a bit because the lid from solution #1 is hiding underneath.
- CAD software: OpenSCAD
- Printer: Makerbot Replicator 2
- Filament: Dark blue PLA, white nylon
Solution #1, a new lid
Here is the bowl and a lid I printed for it shortly after I got the printer. It is one of my first designs.
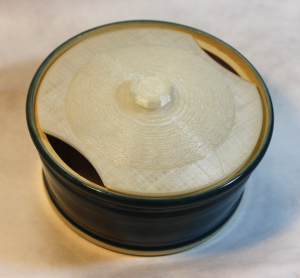
Problem #1: The printer is not big enough so I had to make "vents" on each side.
Problem #2: When used in a microwave. steam from heated food is absorbed into the PLA, so it warps.
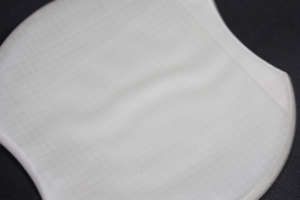
This PLA is not food grade so I did not really want it in contact with food anyway.
Solution #2
This is the idea we came up with yesterday. Make a knob that attaches to the existing handle but is easy to grip. It's outside the bowl, so no problems with food contact and no contact with steam so (hopefully) no warping.
Design issues
So far nearly everything I print requires several iterations. This one was no exception.
Design #1 - One piece, all PLA
This one has fingers that are supposed to grip the knob. They are too brittle, so when I tried to snap the knob onto the lid, they snapped off.
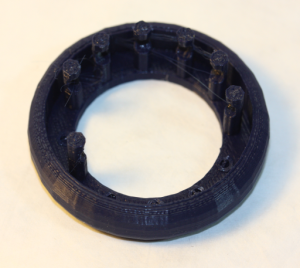
PLA is brittle but has a nice hard smooth surface.
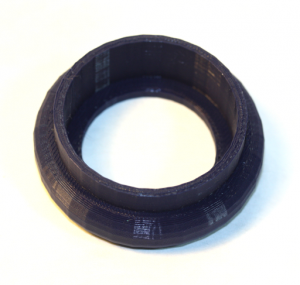
On the other hand nylon is soft and flexible. I just got some nylon filament (Taulman 618). This inspired me to try making a two piece part. Nylon fingers to grip the handle on the lid, and a PLA knob to hold the fingers in place.
Design #2 - PLA + Nylon
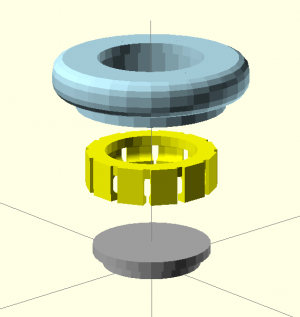
PLA handle
Nylon insert
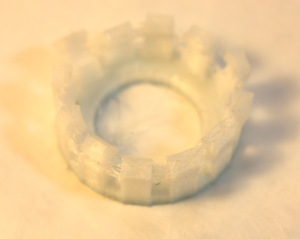
To understand why the insert in design #2 fails, you have to think about how 3D printing works. Software converts your 3D model into layers. A thin bead of plastic is squirted out an extruder (just like a glue gun) to form each layer.
This means when I tried to push sideways on the fingers, they just parted on the join between the horizontal layers. Snapped right off! Some of them broke at the base and some broke at the thin spot.
Design #3 - PLA + Nylon strip
To get around the shear problem, I printed a flat nylon strip. Then I wrap it around the lid handle, and push the PLA knob down over it.
This works because when building up the flat strip, the successive layers are run at angles, the first layer is at 45 degrees and the next is at -45, so the resultant strip is very flexible and can be bent into a tube.
It works!
