Branch versioning
This page is about the Esri ArcGIS Enterprise "Branch Versioning".
As usual there are only a few free resources because this is a relatively new thing and Esri wants you to pay for training. Nonetheless, I persist.
I am not going to explain what it is here because that's described elsewhere. This page is my notes made while experimenting. See the resources section below for detailed information.
Versioning
You can set a feature dataset or a feature class to use either traditional or branch versioning, in the same geodatabase.
History grows forevermore, there is no way to remove it "at this time."
Putting a feature class into versioning
- Upgrade ArcGIS to 10.9. Fix all the things this breaks.
- Try, with existing SQL Server. Discover that SQL Server we installed with ArcGIS 10.4 (or so) is TOO OLD.
- Switch to another database on a newer server, one that's maintained.
- In meantime, ArcGIS Pro 2.9 came out. Install that.
- Discover 2.9 requires a new license manager. Install it, corrupt existing licenses, call Esri. (This takes all concurrent licenses offline for a few hours.)
- Try again. I am working with my "repeater sites" feature class.
- In Pro (now at 2.9!) make a connection to the db and import the feature class.
- Remove the layer importing automatically added to the current map for you without asking, because it creates a schema lock.
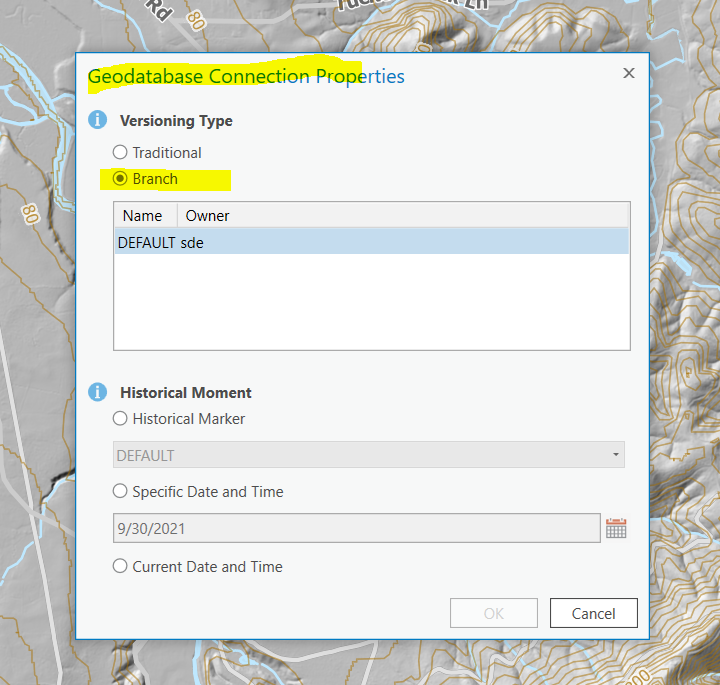
- Enable Versioning + Branch. (Catalog->Databases->Properties->Manage)
- Add global ids to repeater_sites. Looks like this will happen in Pro now when I enable Branch Versioning.
- Enable editor tracking. This is also part of Pro.
- Sadly time will be in UTC. Option for local time is disabled with Branch Versioning.
- Quit and restart ArcGIS Pro at this point, because it's doing the things where every tool is "zoom to infinity".
- Restarting does not help, it's still stuck. Ha ha ha so fun!! It's the Esri webroot anti-virus bug!!
- Pound on the keyboard until the problem goes away. I am not kidding. This is the solution.
- Change database connection from catalog too, not sure what this does but it seems important.

Okay pressing on, glue the Portal and the SQL Server together, also known as Manage Registered Data Stores
THERE IS A BUG HERE THAT COST ME MOST OF TODAY. THIS PROCESS CREATES A CONNECTION STRING THAT YOU CANNOT EDIT THAT IS WRONG.
Do NOT go to Share tab, and "Data Stores". This is USELESS because it will only create traditional version connection and that won't work here.
Connection strings
- Created by official process, does not work:
SERVER=cc-thesql;INSTANCE=sde:sqlserver:cc-thesql;DBCLIENT=sqlserver;DB_CONNECTION_PROPERTIES=cc-thesql;DATABASE=gis_sandbox;USER=sde;VERSION=sde.DEFAULT;AUTHENTICATION_MODE=DBMS
- Works:
SERVER=cc-thesql;INSTANCE=sde:sqlserver:cc-thesql;DBCLIENT=sqlserver;DB_CONNECTION_PROPERTIES=cc-thesql;DATABASE=gis_sandbox;USER=sde;AUTHENTICATION_MODE=DBMS;BRANCH=sde.DEFAULT
Instead attempt to publish the layer, which fails because your database is not registered. Then click on the ellipsis next to error 00231 and select "Register Data Source With Server".
- Select "Portal Items" (the default)
- "Add"
- Meaningful title like "gis_sandbox" which is also the database name in my case.
- A good tag, like "Test"
- A Portal folder like "GIS_Sandbox"
- The database connection will be "SQL Server", and use database authentication with user "sde" and your password.
- Set "Share with" which in my case is "GIS Team"
- It should figure out the name of your one and only server. Pick it and do "Validate"
- "Create" (or later on you can do changes and use "Save")
- I can go into Portal now and see a Data Store object right where I expected it.. in a new folder called GIS_Sandbox.
- Create a web layer
- In the Map Properties, under General, turn on "Allow assignment of unique numeric IDs for sharing web layers.
- In the Edit tab, make sure editing is turned off.
- Pick a layer and use "Share As Web Layer". I used my "points of interest".
- It's going to be a Map Image layer, with Feature access enabled.
- Under "Configuration" select Version Management and select a Dedicated Instance, not Shared.
I used second method to create a new version, the Versioning Tab.
Resources
In the Esri training site there is one 62 minute video called "Version Management with ArcGIS" that you can watch that gives a pretty good overview at the start then dives in way too deep (I stopped watching).
Version management API (ref doc)
Blogs
Managing your Branch Versions in Experience Builder